

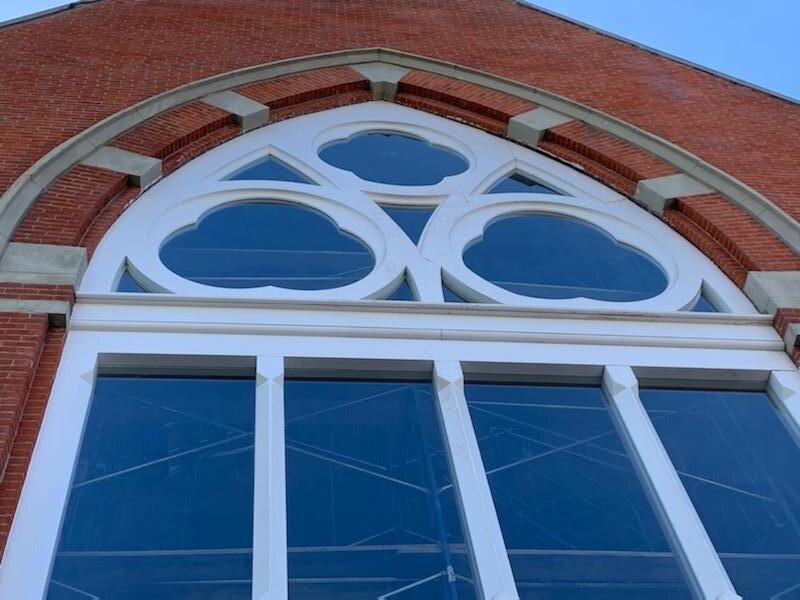
Stuyvesant Heights Church’s historic wood window after restoration by Right Path Windows & Doors.
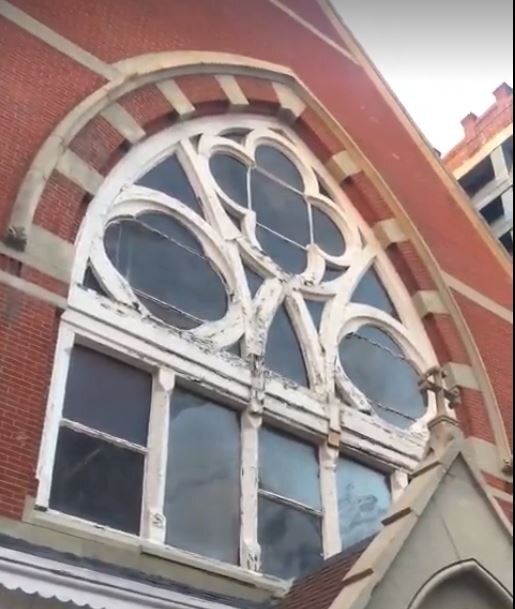
Stuyvesant Heights Christian Church is of a Victorian Gothic style located in the Bedford Stuyvesant neighborhood in Brooklyn, New York. It’s situated on the corner of MacDonough St. and Tompkins Ave.

The century-old wood window was nearly as tall as two pick up trucks stacked end to end.
The church was designed by Massachusetts architect George Hathorne, who is also noted for designing the then-largest building on the campus of Amhurst College. Constructed between 1873-74, the church acquired its current name in 1944.
The 1870’s stained glass window is original to the church. It is notable for it’s sheer size at thirty-four feet tall. To put that into perspective, imagine two pick up trucks stacked lengthwise, end-to-end.
The substantial size also equals substantial weight. There was a considerable concern that the window would not survive the winter were it not restored. The congregation rallied to the cause, raising the funds for the process to begin.
As an expert in historic wood window restoration, Paul Mulcahy was contacted by the NY Landmarks Conservancy (NYLC), Director of Sacred Sites Program, Ann-Isabel Friedman, to be a part of the resuscitation of this window.

Both Stuyvesant Heights Church pastor Rev. Sharon Walker and Ms. Friedman were instrumental in securing a grant from the NYLC which helped make the complete renewal of this historic stained glass window possible.
When we arrived at the site, the window was in an advanced state of deterioration. There was a very real danger of it collapsing in upon itself. In a worst case scenario, it could have toppled outward and onto the street.
The horizontal wooden member that supported the arched top was completely decayed.

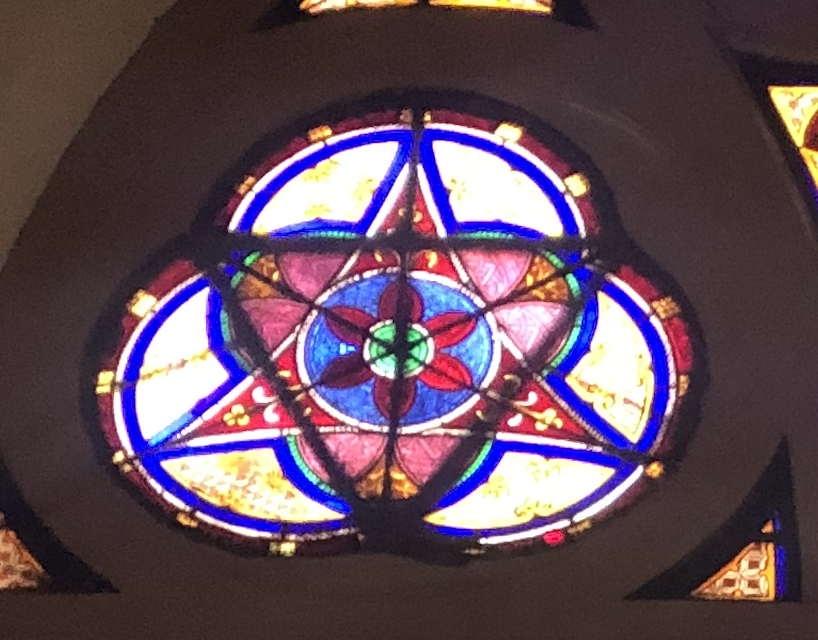
The window was missing pieces. It also had broken pieces around the border, replaced at one time by period-appropriate salvaged glass.
Of note is that the glass and lead cames were remarkably thinner than most stained glass windows. However, that only slightly lessened weight of the window.
It was slowly collapsing into a void created by flawed construction of the original window. Poor blocking between the arched top and the rectangular bottom was the crux of the problem.
Before work began, we applied plastic sheeting to protect the sanctuary and the seating area from exposure to unnecessary dust and debris.

Then we installed an elaborate scaffolding system. Then, highly detailed field measurements were made to ensure that every last detail was replicated. And there were many.

One of many dimensional references for the multifarious historic wood window.
However, before we could begin removing the window, we had to be certain beyond a doubt that the scaffolding could take the added stress from that task.
We installed additional bracing and put another deck on top, so that we could fasten additional bracing to the wall above.
Then we were able to begin taking apart this window. It was 8’ thick. So the tool of the day was a reciprocating saw.
We also had to carefully remove the plaster work which had been beveled into the edge of the window.
Once we got our system down, taking apart one small section at a time and physically carrying down the stairs of the scaffolding, our system was working.
Then, we began the painstaking process of demolishing the window. With the stained glass removed, we very carefully first removed the heavy upper arch.

Three days later, we had the window out. We could then start looking at the rebuilding of the sill, the wall under the sill, and inserting a new copper metal panning.
New 6”x2” framing was securely fastened all the way up to the top of the spring line of the window. We took great care to make sure this was bracing was above and beyond what was necessary.


This framing was then wrapped with a waterproof membrane which came all of the way down to the metal panning. This ensured that if any water droplets were to get through brick molding and caulk, the moisture would be correctly directed downwards to the bottom of the window and out.
We then went to work in the shop fabricating a brand new, old window. The lumber used was Sapele mahogany, as this species is regarded for its strength and rot resistance. Although the most modern technology and tools were at our disposal, only old-fashioned craftsmanship could be relied upon to replicate the historic details.
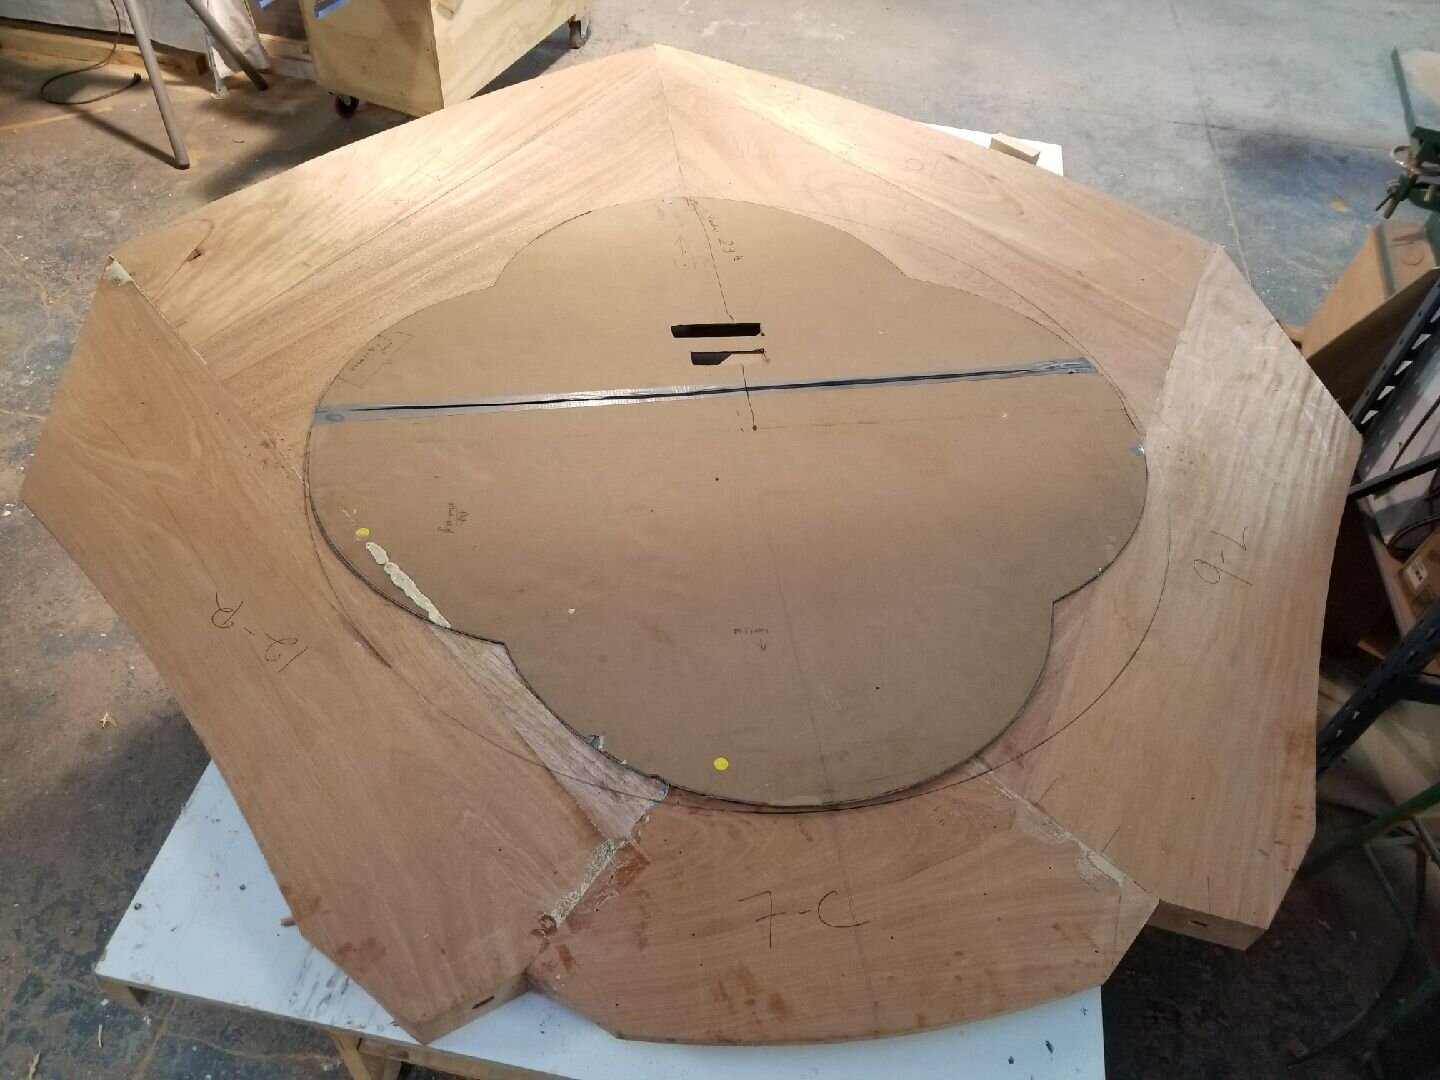
The template process in progress.
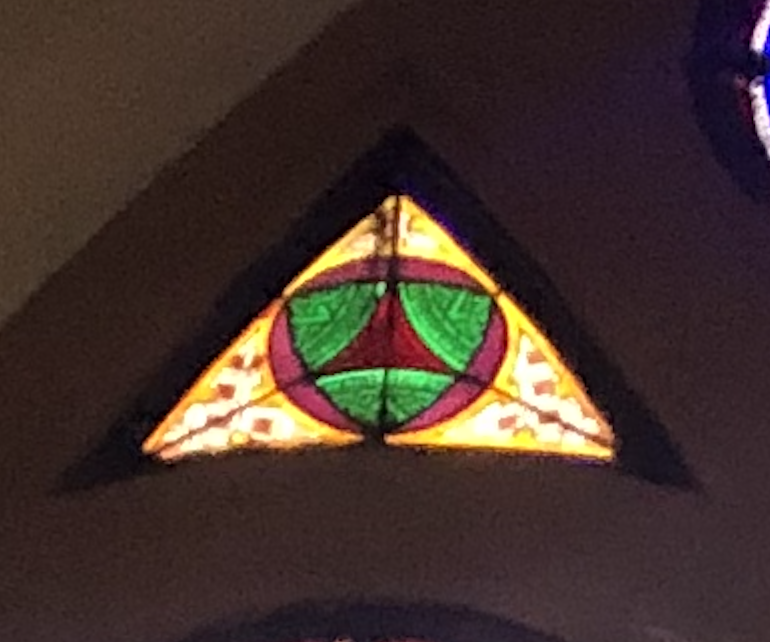
Thus began the meticulous process of recreating the components of the window. The topmost triptych section of the window required the utmost attention to detail.
Working to a precise template was the first step towards creating each individual of the individual small rose windows.
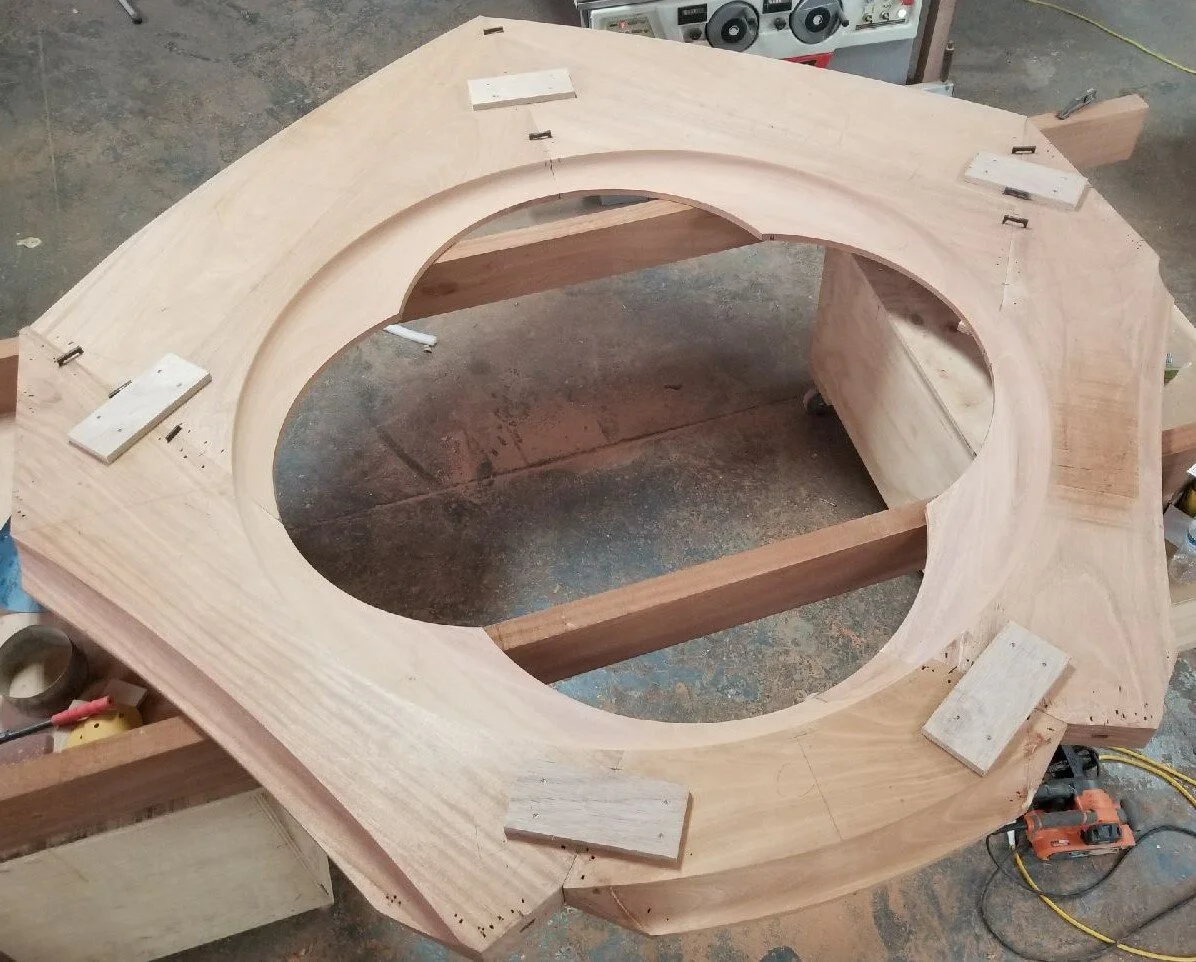
An individual section of the triptych coming together.
With the opening for the glass completed, next came the honing phase. The edges were rabbeted to be received by the supporting members.
Joints were reinforced to ensure no movement as the piece was being fabricated to very precise specifications.
Once the stained glass was installed, there would be no tolerance for even the slightest of discrepancies in dimensions.
Machines can only do so much. There is no replacement for hand carving. A keen eye and years of experience were the only means of achieving a finely wrought replication of the historic window.
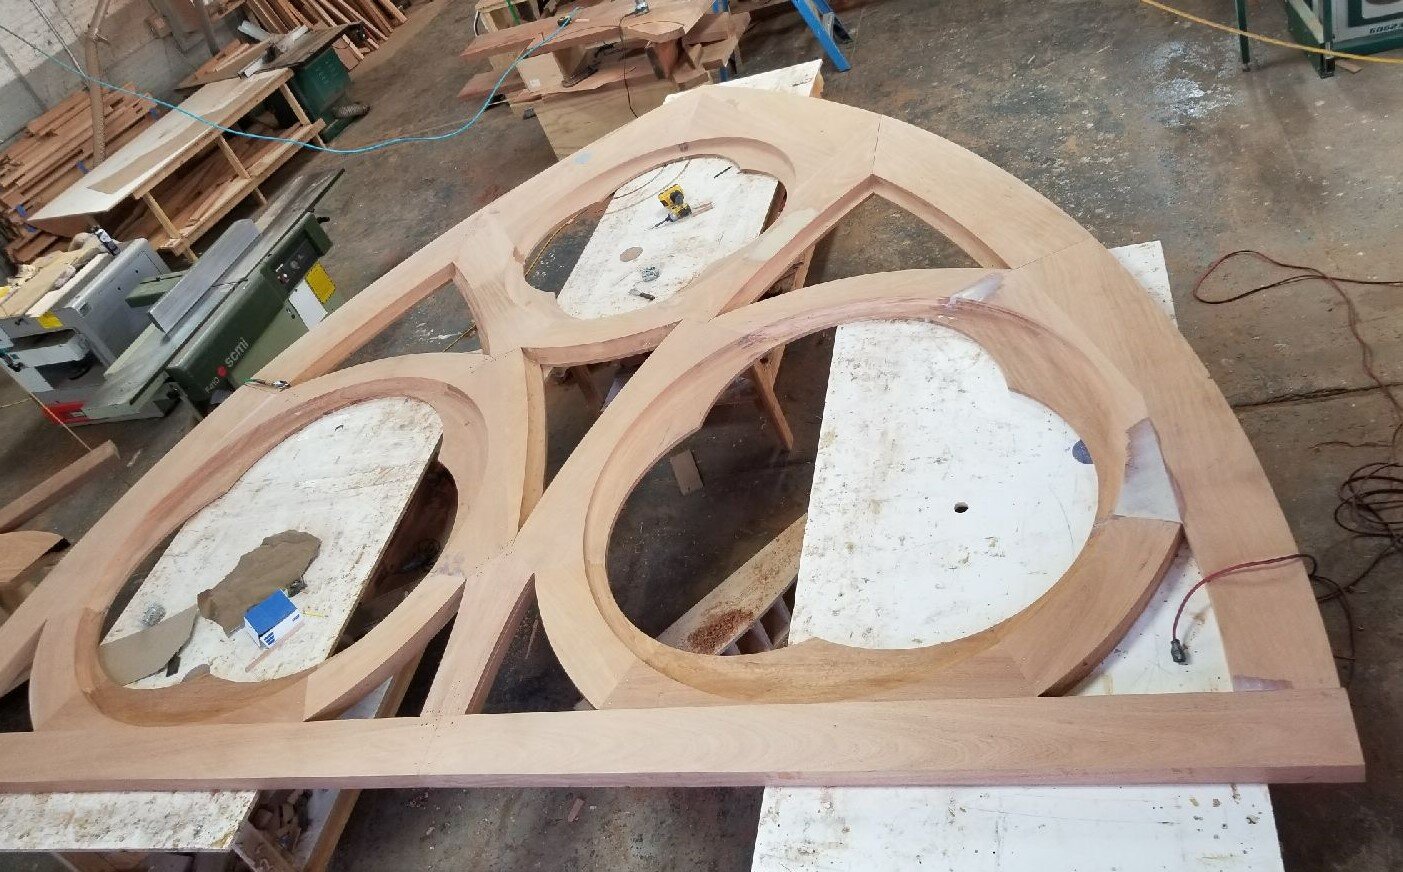
The arched triptych assembled. The hand carved gradations reflect the character of the original window.
A nearly bird’s-eye view of the completed arched triptych section of the historic window created by the skilled craftsmen at Right Path Windows & Doors.
Then, as installation began, we dropped a centerline from the peak of the opening and we started building up left and right of it. There was no brick molding as such, so cutting in the window tightly was very important.
We very quickly realized the opening was in twist, meaning one shoulder was diagonally off plumb to the bottom opposite shoulder.
This can often be the hardest type of scenario to deal with. Regardless, after some careful adjustments we were able to figure out the correct solution.
Then we set one post at a time on a line of sill capped by a new sill. Then we continued to set more posts and the window started to go up.
Once we got to the spring line we started working on the upper portion of the windows.
The premade joints in the shop made the installation so much easier and it felt like a jigsaw coming together. All we needed was clamps and glue and some concealed fasteners.

In principle, the top of the window was fabricated like a double sandwich. The outside layer was to take the tempered clear protective glass and the inside layer of the sandwich was to take the stained glass.
As we built the window up, and installed the outer layer of the glass, we were in essence sealing ourselves in, since we did not have a scaffolding on the outside. So as we went, we caulked and painted the exterior.
Once we started getting to the upper portion, we knew we were going to have to rely on an aerial lift from the outside to finish.
This was nice convenience since it gave us a second chance to clean all of the glass while we finished up the exterior touch ups and caulking.
This was not the easiest of installs, but the result is a thing of beauty to be enjoyed for at least another century by parishioners and passersby alike to enjoy.
Watch the video of the project coming together:
RELATED POSTS:
Located at 42 E. 69th St, the New York headquarters of the Jewish National Fund (JNF) is housed in what was once the home of financier Arthur Sachs.